Create LXC container for GUI application - EALite
The use of containers in the software industry has spread widely and it is not surprising, it offers developers the possibility of improving the isolation of their services and thereby making it less susceptible to errors due to collisions with other services or dependency conflicts. At the same time, they are a more resource-friendly alternative compared to virtual machines.
Multiple cloud infrastructure providers offer the option of deploying services from a container, and undoubtedly, it facilitates the distribution of development environments and applications.
With these benefits (something similar to what was discussed in Installing Packages in Linux (Mint)), we will proceed to create a container for the execution of Enterprise Architect (the viewer version, but it is applicable to the full version). Officially there are instructions for its use in Linux with Wine but the recipe is incomplete (an extra instruction must be added) and it is better not to dirty our 64-bit system with 32-bit libraries unnecessarily. So let’s get started.
Install LXD
Our first step will be to install the LXD package, which is available through multiple package managers of Linux distributions but also as a snap package. For simplicity, I will use the snap package.
sudo snap install lxd
Now, we must initialize (it is only necessary the first time after installing).
sudo lxd init
In my case, I have left all the values that are asked at their default value. Personally, we should only worry about the size of the unit used (in case of having limitations in storage space).
Create GUI profile
By default, the behavior of containers is for the execution of services and console applications. Therefore, the execution of a graphical application requires an additional configuration, which is to make the pass to the graphics system of our host system.
The graphical profile is defined with the following code (copy and paste into a new file, lxdguiprofile.txt).
config:
  environment.DISPLAY: :0
  raw.idmap: both 1000 1000
  user.user-data: |
    #cloud-config
    runcmd:
      - 'sed -i "s/; enable-shm = yes/enable-shm = no/g" /etc/pulse/client.conf'
      - 'echo export PULSE_SERVER=unix:/tmp/.pulse-native | tee --append /home/ubuntu/.profile'
    packages:
      - x11-apps
      - mesa-utils
      - pulseaudio
description: GUI LXD profile
devices:
  PASocket:
    path: /tmp/.pulse-native
    source: /run/user/1000/pulse/native
    type: disk
  X0:
    path: /tmp/.X11-unix/X0
    source: /tmp/.X11-unix/X0
    type: disk
  mygpu:
    type: gpu
name: gui
used_by:
Now, we will create the profile:
sudo lxc profile create gui
cat lxdguiprofile.txt | sudo lxc profile edit gui
This procedure is only necessary to do the first time.
Get base container
Once the profile is created, we will launch a container using a base image, that is, on which we will develop our need. These base images are available on the project page and are bases of multiple Linux distributions, with different versions and architectures.
For our purpose, we will use an Ubuntu 18.04 base for i386 architecture, which corresponds to 32 bits. You can use another distribution as long as it has a way to install the necessary packages and in recent versions (the more recent Wine is, the better).
sudo lxc launch --profile default --profile gui images:ubuntu/18.04/i386 ea
When we do not require the graphical part, we can omit --profile default --profile gui. The two profiles are an inheritance process: first the default profile is loaded and then what is necessary for graphical applications is added.
This procedure is the first time for each container. If by mistake we omit the graphical profile, we will have to recreate it. If due to an error in the container specification we want to delete it, we can execute sudo lxc rm ea --force. Forcing is necessary to stop the execution of the container, or equivalently we could stop it first, sudo lxc stop ea.
Commands in the container
To install our program in the container, we need to execute commands in it. For this, we have lxc exec {container} -- {command}. An interactive way, suitable for testing, is to run bash.
sudo lxc exec ea -- /bin/bash
This way we can execute the commands in the same way we do in our system, since we are in the container.
If we want to automate, we will be interested in sending the instructions directly instead of bash. Example, sudo lxc exec ea -- apt update -q. Note that a command that requires administrator privileges has been used, and this is because by default entry into the container is as administrator. To make use of the standard user we must indicate it explicitly (by default, we have the user ubuntu), sudo lxc exec ea -- su - ubuntu -c 'echo $(uname -a)'.
Manage files
File management is performed with the file pull and file push commands.
Thus, if we want to send a file:
sudo lxc file push {local file} {container}/{container path}
And if we want to retrieve a file from the container:
sudo lxc file pull {container}/{container path} {local file}
Install EALite
Now that we know how to execute commands in the container, we will install the dependencies and finally EALite.
sudo lxc exec ea -- apt update -q
sudo lxc exec ea -- apt install --install-recommends -y wine-stable winetricks
sudo lxc exec ea -- apt install -y fonts-crosextra-carlito
sudo lxc exec ea -- su - ubuntu -c 'winetricks --unattended msxml3'
sudo lxc exec ea -- su - ubuntu -c 'winetricks --unattended msxml4'
sudo lxc exec ea -- su - ubuntu -c 'winetricks --unattended msxml6'
sudo lxc exec ea -- su - ubuntu -c 'winetricks --unattended mdac28'
sudo lxc exec ea -- su - ubuntu -c 'winetricks --unattended jet40'
wget http://www.sparxsystems.com.au/bin/EALite.exe
sudo lxc file push EALite.exe ea/home/ubuntu/EALite.exe
sudo lxc exec ea -- su - ubuntu -c 'wine msiexec /i EALite.exe'
At this point, we will proceed graphically to the final installation of EALite.
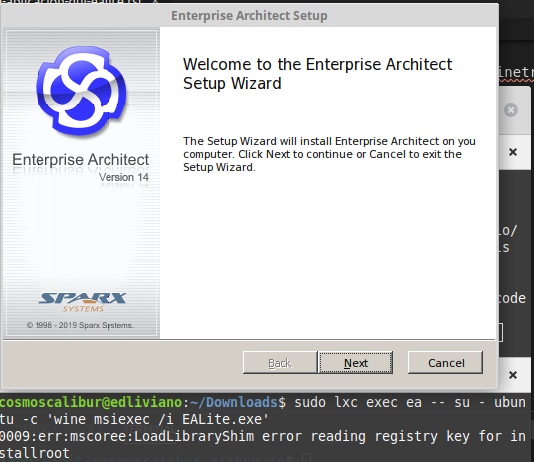
EALite graphical installation window.
Now, it is necessary to create a simple mechanism for executing EA.
sudo lxc exec ea -- su - ubuntu -c 'mkdir $HOME/.local/bin'
sudo lxc exec ea -- su - ubuntu -c 'echo "wine $HOME/.wine/drive_c/Program\ Files/Sparx\ Systems/EA\ LITE/EA.exe" > $HOME/.local/bin/ealite'
sudo lxc exec ea -- su - ubuntu -c 'chmod 755 $HOME/.local/bin/ealite'
Run EALite
Now, we can use the Enterprise Architect viewer.
sudo lxc exec ea -- su - ubuntu -c 'ealite'
When we start the operating system, we need to start the container before executing the previous instruction, sudo lxc start ea.
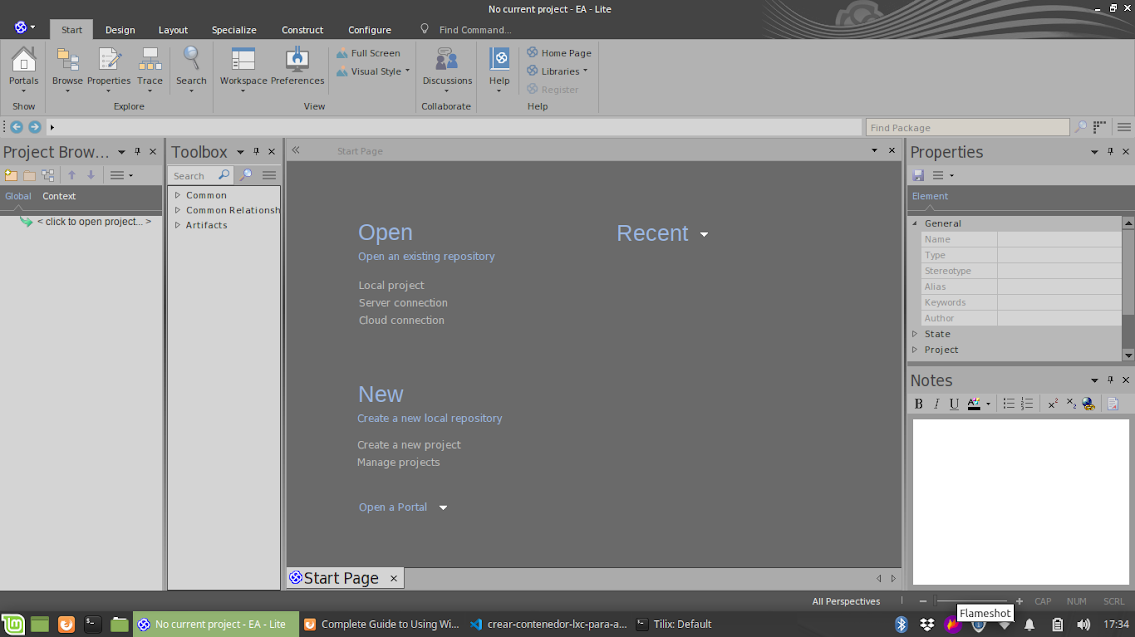
EA Viewer open.
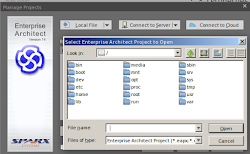
Access to the container file system and not just the Wine drive.
You can ensure a simple way to run EALite by creating a launch routine with the previous two lines in a file that is recognized in the path.
mkdir -p $HOME/.local/bin
cat << EOF > $HOME/.local/bin/ealite
sudo lxc start ea
sudo lxc exec ea -- su - ubuntu -c 'ealite'
EOF
chmod 755 $HOME/.local/bin/ealite
Execution with sudo can be omitted if the user is added to a group that allows lxc execution. Later, I will make a post on how to do it. For now, have fun running ealite and entering the administrator password.
To open a project, remember to use file push and explore inside the container.
References
can’t run “glxgears” in root on lxc 2.0 container. Solution to a possible error using GUI in LXC.
How to easily run graphics-accelerated GUI apps in LXD containers on your Ubuntu desktop.
This article was originally published in Spanish on 2019-11-11.